tauster
Paint Manipulator

Posts: 184 
|
Post by tauster on Sept 27, 2013 1:45:27 GMT -5
I love all of your golems & elementals, but the last one is my instant favourite. It could be used not only for a scrap golem mini, but also for an Animate Object(s) spell. Seeing this little guy makes me want to play a mage specializing in these animation spells (a PC concept I'm toying with for years)...
|
|
tauster
Paint Manipulator
Posts: 184
|
Post by tauster on Sept 26, 2013 16:37:06 GMT -5
I use regular craft colors, most of which I buy when they are on offer in the supermarket or cheap on ebay. I just got a box of 100 empty small (20 ml) plastic containers, where I can store shades that are left after a paint job. I don't need a color called 'Skull White' (even if it sounds damn cool) - I just mix other colors in my regular white until I get a shade that looks about right. Do I get ideal results that way? Hardly. But for me, this is sufficient at the moment. ...which is another way of saying that this attitude to colors might change, like this week when I bought higher quality brushes that were more expensive than the cheapos I bought before.
|
|
tauster
Paint Manipulator
Posts: 184
|
Post by tauster on Sept 26, 2013 4:00:56 GMT -5
thanks for the praise! (what is AV?) I found some time to glue on the neodyms, and it turned out that I was right about the importance of balance - but it also turned out that while glueing the magnets on, I could easily toy around with the direction of the tentacles - glue the 'dym on with a little spot of hotglue and put it on parchment sitting on a flat ground. Then, while the glue hardens, balance it until it stands from alone or almost alone, since the neodym will compensate for a little unbalance. If you did well, later on when you out it on a magnetic base, you can use even a pretty small base without the pseudopod tipping over (but the bigger the base, the more stability the thing will have, obviously). Ladies and Gentlemen, please welcome Sally Summoner and her nine Tentacles!  i.imgur.com/uwul9Lh.jpg i.imgur.com/uwul9Lh.jpg Another thing I realised during all this balancing stuff: When you have these waving and twisty-looking things balanced out, they look right when standing on the base - 'right' in the sense of ' believable' or ' realistic'. And this makes sense: Everybody tends to balance her-/him-/itself out, even an otherworldly tentacle from beyond space and time. Because even if you're a neigbour or Astaroth and exist in an non-euclidian space where stuff like gravity and balance make no sense (to mortal minds, at least), once you visit the PC's homeworld, you are subject to the rules of the material plane (apart from some really weird planar campaigns... *g*), so you have to find a way of keeping yourself upright. And even if I paint some of them black and use them as conjured/summoned tentacles made out of weightless shadowstuff, it still looks better if the balance is right. I tried (and sometimes succeded) to add some glue strings, giving them a more organic look: i.imgur.com/bEVY6S4.jpgOne of my favourites that has an eye (glue dribble) at the end of it's tip. I must have seen this kind of thing on some cthuluesque picture because this look has an extremely familiar ring to me, but I can't remember where... imgur.com/PAIa2N0Looks like a snake: i.imgur.com/O523OyV.jpgThis one accidentally got a larger head than the others (I didn't intend to make heads or head-like ends, but some looked good so I kept them). I added a 'ridge' on the top and one below with a hole going trough, making it look like an external vein... i.imgur.com/yg4iYeE.jpgMy original motivation to do these things differently from Scottie's way was that I didn't want to wait for the papermaché to dry and harden, so I figured that with a stabilising thread in the middle and aluminum foil or dry paper wrapped around it, I could save time. It turned out that while this may be true, it's not very important if you are not in a hurry. Crafting is done mostly in the evening, so stuff has all the nifght (and most of the following day) to dry/harden. I will try Scotties method next and see how both compare. I guess his version will be a bit lighter, even if the mojority of the mini's mass is hotglue (something that I hadn't thought of before). Other things I learned: 1) ...ouch!Aluminum foil is an excellent heat conductor. This is important when you work with hotglue. 2) Paper vs. Aluminum foilTwisted paper is an adequate ersatz for aluminum foil. It is cheaper and more sustainable, since aluminum is produced with an awful lot of fossile energy and it makes no sense to waste that in a mini if there are alternative ways of reaching your end result. You will see that paper will re-twist a bit after you have wrapped it around the thread, but you will stabilise it with the hotglue later. Also, if you don't wrap it around the thread very tightly (which tends to happen with aluminum foil), you get more interesting textures later on. The texture of the aluminum foil will mostly dissapear below the hotglue, so paper leaves you with a tentacle that has more... character. Or lets just call it ' interesting bits'... 3) Hot glue magicWhen applying the hotglue, don't until it is dried completely - touch it (when it not searingly hot anymore, of course), draw some whisps and press them again on the glue. You'll end up with some interesting texture that will come out greatly once drybrushed (similar to the mushroom stems, I hope). Also, if you have some glue dribbles, re-use them and glue them back on. Hot glue dried normally in round shapes, but if you have already dried dribbles, you can cut or rip them to et some edges and pointy ends. Tentacles love pointy ends and spikes. |
|
tauster
Paint Manipulator
Posts: 184
|
Post by tauster on Sept 26, 2013 2:07:10 GMT -5
I already posted these pictures in apokism's Treants thread, but last night I realized that there are many different ways of crafting tentacles. So I figured that I'd better do a separate thread for all kinds of crafting pseudopods, as with the mushroom discussion. I continued yesterday with the pseudopods, but before posting these pics, I'd better re-quote what I wrote in the Treants thread to show you how this project started:
Best* way of creating bark texture is, ...well... using bark:
Grab a nice rough piece of bark and use it as a stamp. This is super-easy and creates a realistic-looking texture that would probably take longer than clay needs to dry (which can be several days) if you try to model it with a tool. At least with my modeling skills...
* 'Best' in the sense of 'fastest and most realistic'. I know there is no one right/best way...
I started with pseudopods yesterday (see Scottie's turorial), so I took a few shots to show how bark texture can look. Of course it can look very different, depending on the type of bark you use as a stamp. I used a willow bark that I had already painted for use as a piece of rock in my games, but I was too lazy to rummage through the box with the dried bark pieces. I can recommend willow bark in general - it has a great texture for stamps and with black basepaint and some drybrushing looks very much like rock. anyways, here's the pseudopod WIP:
i.imgur.com/dtQxlpj.jpg
i.imgur.com/uKKWotq.jpg
i.imgur.com/uyjB2Pd.jpg
i.imgur.com/iYknuX6.jpg
Originally, I wanted to sculpt the upper parts of the things* out of lightweight sculpting mass (LSM), but it turned out that a) it didn't want to adhere to the clay and b) wasn't as easy to work with as before (I sculpted some little hills out of this stuff before that were done in seconds rather than minutes). I tried to form a roll with the LSM, but this time it sticked to my hands rather than itself or the clay, so I quickly gave up and continued with clay. * I'm not sure 'creature' is the right word to describe a pseudopod...Anyways, below are the update pics:  Blurry picture with less light, but you can see the texture better: ![http://i.imgur.com/n4TlcGf.jpg]()  Balance: Balance:If you work with tentacle-like shapes, taka care to have the miniature's balance in mind. As you can see, these critters bend around, looking like waving / swinging back and forth. While this is exactly what I wanted, it's also required for balance because center of gravity has to be close enough to the mini's base to avoid tipping. Teeth:I didn't add teeth so far because I rather like the looks as they are at the moment, but I think once the clay dried, at least one of them will get little stones glued on... Paint:I'm still unsure whether to paint these up like Scottie's fleshy tentacles (see link above) or as Purple Worms. Which tells me that I should probably do some more.  |
|
tauster
Paint Manipulator
Posts: 184
|
Treants
Sept 24, 2013 2:10:30 GMT -5
Post by tauster on Sept 24, 2013 2:10:30 GMT -5
Google-ing all of those ideas sir(Northtroll)! I've been trying to figure out how to get that rough bark look since I started! Thank you, thank, thank you! Best* way of creating bark texture is, ...well... using bark: Grab a nice rough piece of bark and use it as a stamp. This is super-easy and creates a realistic-looking texture that would probably take longer than clay needs to dry (which can be several days) if you try to model it with a tool. At least with my modeling skills... * 'Best' in the sense of 'fastest and most realistic'. I know there is no one right/best way...
I started with pseudopods yesterday (see Scottie's turorial), so I took a few shots to show how bark texture can look. Of course it can look very different, depending on the type of bark you use as a stamp. I used a willow bark that I had already painted for use as a piece of rock in my games, but I was too lazy to rummage through the box with the dried bark pieces. I can recommend willow bark in general - it has a great texture for stamps and with black basepaint and some drybrushing looks very much like rock. anyways, here's the pseudopod WIP:
i.imgur.com/dtQxlpj.jpg
i.imgur.com/uKKWotq.jpg
i.imgur.com/uyjB2Pd.jpg
i.imgur.com/iYknuX6.jpg
|
|
tauster
Paint Manipulator
Posts: 184
|
Treants
Sept 23, 2013 4:28:07 GMT -5
Post by tauster on Sept 23, 2013 4:28:07 GMT -5
This is some seriously awesome work, period! I have long since been looking for a way to do treants, but I didn't really like the variants I had found so far. Most were not bad, but nothing that make me want to base my versions on. Your's finally pushed me over, so this will be one of my next projects. *rubs twigs hands*  Just one (silly) question: Is it only me or does the large one on the left look like being caught in a hip hop pose? (I tried to find something similar on google pciture search but could come up only with this and this. Not identical to your treant, but you'll get the idea...) Posing or not, it looks really cool! Especially the facial expression - they seem to be seriously pi**ed off! * leaves thumbs up*  |
|
tauster
Paint Manipulator
Posts: 184
|
Post by tauster on Sept 23, 2013 4:06:33 GMT -5
Got another batch finished, and some of the previous batch re-done (I didn't like the green & brown color scheme). Some pictures below, with a few comments (I try to keep myself from rambling, lets see if I succeed). With these I kept the original color scheme, but only for the heads: i.imgur.com/T8hwcGO.jpgThe classic red-with-white-dots variant: i.imgur.com/MHOFpbz.jpgYou can see it not very well in the shot, but I varied the red: The two in the background have a lighter shade, while the other two have another, slightly darker red layer painted on. Plus, I like the stems in the foreground much better (more on these below). The two reds in the foreground look a bit like chilis. I started with a dark orange and added a rather thick red layer: i.imgur.com/jcL3snr.jpgThe brown ones are not really bad, but nothing exciting either. The large mushroom on the right was the center stem of a garlic buld in it's former life. i.imgur.com/KA5HWBa.jpgI left some models unfinished so that in case I stumble over a nice idea in the future, I don't have to start from scratch. Having some blank 'shrooms left over gives me a head-start, saves a lot of work and thus keep the threshold low for trying out new fungus stuff. i.imgur.com/x6cn85u.jpgThis is my favourite batch: i.imgur.com/mYq4yNl.jpg They started out as the green-brown variants that I wanted to modify. I fired up the hotglue gun and pressed the nozzle in the cap's glue when it was only warm but not extremly hot. This leaves a nice crater-like impression in the cap. I think it looks organic (in the sense of grown) but unnatural at the same time, making them ideal for terrain in the Feydark (underdark meets faerie plane). I will probably convert some (or all) of the blanks to this, but maye with a different color scheme. I'm still looking for some cool name for the different kinds... I think the cratered ones will be called faerie eyes, eye-caps... And they should have some magical effect, or at least be used in a way connected to magic... for example growing only in the presence of strong faerie magic like a gate between the two worlds, or somesuch. Ideas are welcome!I absolutely love how the stems turned out. You can get this in the usual way (drawing the nozzle of the gluegun over the glue to create texture), and then touching the glue while it hasn't completely settled - which does exactly what you usually want to avoid: Drawing glue whisps. Here, the whisps and filaments are a desired result. Basepaint the whole stem in a dark brown, add a much lighter, sand- or mud-colored tone with a heavy stroke of the brush and drybrush it with an off-white , light grey or white. I can very well see underdark races using these mushroom stems as building materials, the way that surfacers use wood (only that in the underdark, this ' fungus ersatz wood' should be much rarer). So if I ever build some underdark terrain that involve pieces that the native races had crafted, I could use this technique for the fungus wood. The downside is that is is much more work- and thus time-consuming that simply using a wooden variant like in DMG's doors & bokcases. But who cares if the end result looks better? ...so there you have it: I rambled again. |
|
tauster
Paint Manipulator
Posts: 184
|
Post by tauster on Sept 22, 2013 15:50:32 GMT -5
Simply wow. Can't really say more than that!
|
|
tauster
Paint Manipulator
Posts: 184
|
Post by tauster on Sept 20, 2013 17:51:36 GMT -5
Worked on the 3rd batch of toadstools (16 pieces, all with papercone-caps as described above). The lord of the house already approved them. So today I finished painting the stems, but I am stull unsure which colors to use for the caps... All have neodym bases, and the hotglue whisps on the bases of the stems proved to be a godsend, because they add really great texture when basepainted and drybrushed. - mahagony brown as basepaint, then - an olive/ocre/sand color for 1st drybrush layer (with a bit more color left on the brush than usual, as I wanted to cover most of the dark brown), then - the same color, mixed heavily with white. See here for the two drybrush-colors. First drybrush layer applied: i.imgur.com/kuHNXIM.jpgi.imgur.com/BV2FSz8.jpgSecond drybrush layer applied: i.imgur.com/otVkW4v.jpgi.imgur.com/lDo5kO7.jpgThe stems came out very organic-looking, and I'm quite happy with the result. My concern is that the caps won't have such a look, as the glue there dried more uniformly. So either I torture the caps again with the hot gluegun or I'll have to paint some structure on... I also thought about giving the stems a layer of clear acrylic glossy varnish, but I did this on the greenish-brown batch and I don't really like the resut. It looks too wet and/or plastic. Now that I have both variants in front of me, I definitely prefer the matte look. |
|
tauster
Paint Manipulator
Posts: 184
|
Post by tauster on Sept 20, 2013 2:00:54 GMT -5
Excellent tiles, but I have one problem... how on earth is your playing surface so clean and clear? Mine always looks like an assassin vine attacked a phone book and left a trail of sweet wrappers in its wake! Either this is a pre-play foto or he has a gelatinous cube cleaning his table who's trained to eat only crumbs and ignore tiles, dice, books and other important stuff. If the latter is true, I request the public disclosure of the training methods. ...or wait - I better co-found with him a company selling these trained G-cubes.  |
|
tauster
Paint Manipulator
Posts: 184
|
Post by tauster on Sept 19, 2013 14:31:56 GMT -5
Thanks for the comments guys. Been crafting this week after watching more of DM Scottys vids, sir you are a bad influence I will post pics in a few mins. I know this only too well: Scotty's and DMG's tutorials are infectuous like viruses. Once you've seen them, youdon't get them out of your head until you have crafted that stuff yourself. |
|
tauster
Paint Manipulator
Posts: 184
|
Post by tauster on Sept 18, 2013 3:06:59 GMT -5
...guess what: 'nother kind'o fungus!  (I think I might have an unhealthy funghi obsession. (I think I might have an unhealthy funghi obsession.) Try to find some dried lotus pods. Like the funnel-shaped mushrooms, they are used by florists and as decoration material and come quiet cheap. I got a box of 50 pods, prepainted (burgundy, i.e. red/brown) for 13 euro, shipping costs already included: i.imgur.com/HUonjLD.jpgYou don't really have to do much - they already look wicked enough.   The brown 'stump' i sculpted from modelling paste, but paper maché should do the job equally well. Just form a little cone, press the small end of the lotus pod in to form the crater, add some texture on the sides (I pressed a piece of bark in the still-malleable modelling paste), let it dry and paint it up and you're done. They're ideal as mushrooms (the harmless variant), but I prefer to use them as brood chambers for critters. Seriously, this stuff looks like the organic kindergarden for tyranids or aliens, or whatever swarming creatures you want to throw at your players. You don't even have to come up with some foreboding text to read or tell your players - when you put up the dungeon terrain (with the usual descriptions, you put the lotus piece on the table last ( after the party's miniatures) and fall silent. Don't describe it, let the optics of this thing do the job. Look ominously, or try to make no speciaol expression at all. I think the players will be scared like hell.  |
|
tauster
Paint Manipulator
Posts: 184
|
Post by tauster on Sept 17, 2013 8:35:12 GMT -5
The painted toadstools, this time using a more muted color scheme: i.imgur.com/yFxahpw.jpgThe one in the center on the red screw cap is the stem of a garlic bulb.I just glued a neodym on the bottom and gave the stem a light brown priming to cover the hotglue. The next batch of toadstools is already in the works: i.imgur.com/zHLGYLa.jpgThis is how many cones you'll get from a CD cover: i.imgur.com/y2ilRq4.jpgI used the cap of an empty deo roll-on as guide for the circles (diameter 4,6mm). If you want broader caps, cut the circles in half. For more pointed caps, cut them in thirds. A strip of scotch tape holds the cone together (faster than hotglue or whiteglue). [edit] 'nother shot with natural light: i.imgur.com/T0mRsDG.jpg On the left side you can see the next toadstool variant: acorn caps. Pretty obvious, when you think about it... They are smaller than the current toadstool batches (which are slightly higher than a normal-sized creature), yet still large enough for a halfling to get at least some cover behind it. It already somes with an interesting texture, and if you prefer natural colors*, you don't even have to paint the cap. * Of course when you want them to be growing in the underdark, any color can be considered 'natural'...Once you get an eye for shapes, you can't take a walk without finding some stuff - especially in autumn. I hope that eventually, my neighbours will get used to me constantly picking up stuff on the streets... 
Here's another variant for mushrooms: You can buy dried mushrooms that are funnel-shaped on ebay. They're used by florists and for decoration, so they come in bags of dozens or even hundreds and are quite cheap. I'm not sure about their english name, but the german online entries I found call them "Kalix". small variant: i.imgur.com/ie05i1Y.jpglarge variant: i.imgur.com/Fqi9BSB.jpg |
|
tauster
Paint Manipulator
Posts: 184
|
Post by tauster on Sept 17, 2013 1:59:05 GMT -5
...just realised that wrestling action figures make great giants and/or troll miniatures, with a little bit of modification*... * which is beyond my current skills, as I'm concentrating more on terrain crafting.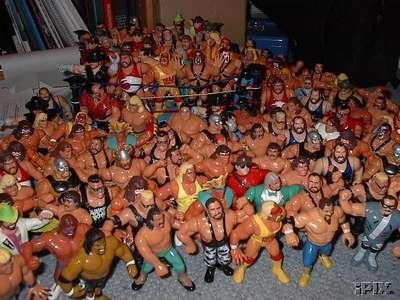 If you look for a while, you should be able to get them cheap by the dozen on ebay, in your local 2nd hand market and on flee market / garage sale. Too bad I din't need giant and troll minis in my campaigns in the near future...  |
|
tauster
Paint Manipulator
Posts: 184
|
Post by tauster on Sept 15, 2013 15:41:59 GMT -5
|
|
tauster
Paint Manipulator
Posts: 184
|
Post by tauster on Sept 15, 2013 15:38:30 GMT -5
I modified DMG's mushroom variant another bit...This is what I had done so far: i.imgur.com/6fE4zFo.jpgThat's basically copying DMG's method, plus glueing a neodym magnet in the base of the toadstool. Now, instead of building the 'shroom cap completely out of hotglue,... 1) I formed the basic cone-shape with a piece of strong paper and glued it on a circle: i.imgur.com/O4nVj7n.jpg2) Then I just build up hotglue on the cone and waited for it to dry: i.imgur.com/cWdpSRP.jpg3) Since hotglue can take quite long until it cools down and isn't sticky anymore (a fact that frustrated me to no end...), find something to stabilise the piece so that you don't have to hold it until it's cold. These three corks do a good job, but if you do more than one piece (which is quite likely), you'll need lots of corks. And you can bet that some will topple and leave you with sticky mess of hotglue. Murphy's law says thatthis will happen in the worst possible situation, creating the most possible chaos on your craft desk (domino effect, anyone?).
Today I ended up with nine toadstools, in less than half the time I needed for the first batch: i.imgur.com/CbnZTCo.jpg
Haven't glued on the neodyms and couldn't paint'em so far, but I am quite happy with the outcome.
...oh, and there's one other thing I figured out today...
I hadn't seen it so far anywhere, so it is either so incredibly trivial that nobody bothered to mention it so far, or I just stumbled over a new hotglue technique that is worth a nomination for the Nobel Price of crafting.
...hey, I didn't ever say I'm modest!
As I said above and we all probably know this from experience, hotglue can be quite frustrating to work with. Not only does it take a long time to cool down, there's also the thing that it when you touch it while it's hot, you'll draw these whisps and filaments, which usually create a mess. Not more. Instead of waiting for it to cool down, dip it in cold water. [astonished silence] Dip. It. In. Cold. Water.Only five words, but they have changed my crafting. I also never said I'm into avoiding hyperboles...
First, you'll save yourself a whole lot of waiting time. Second, when dipping it in cold water, you can arrest the shape of the hotglue. Let me explain: I often applied hotglue and got it in a nice shape, only to see it running away because it was too liquid. If you dip it in water, it instantly gets cold and keeps whatever shape it was in. I still have to experiment with this, but I suspect this opens up new ways of shaping / modelling with hotglue... |
|
tauster
Paint Manipulator
Posts: 184
|
Post by tauster on Sept 14, 2013 10:32:23 GMT -5
doors, bed and bridge are very cool! I haven't thought of stamping a dungeon floor design before, great idea!
|
|
tauster
Paint Manipulator
Posts: 184
|
Post by tauster on Sept 13, 2013 1:56:03 GMT -5
I was thinking about using different Styrofoam peanuts. I thought there were round, cup shaped Styrofoam packing "peanuts" out there. They may be good for bigger shrooms....but not gigantics ones like someone did with the artist sponges. Unfortunately, I haven't that kind of packing stuff through house in a while. I tend to get more of that new non-toxic, biodegradable starch-based foam. The use of those tacks and corks are a brilliant ideas. What about metal bottle caps by themselves? I am using them for a modern campaign as tables with tablecloths on them. Maybe a little weird shaped, but close enough? That's three brilliant ideas in one post! I think I have some of these styro peanuts in the workshop. I suspect they don't like the hotglue, as styrofoam is quite heat sensitive. Let's see... *rubs hands* I absolutely love the idea of caps as tables, but I find them a bit too regular for mushroom heads. Maybe with some irregular hotglue dribbles on them... Some ideas are coming in... |
|
tauster
Paint Manipulator
Posts: 184
|
Post by tauster on Sept 13, 2013 1:49:26 GMT -5
They certainly look like some kind of morel fungi. My I'm wondering what this stuff actually is. There are some small things (seeds?) inside - it rattles softly when I shake it... |
|
tauster
Paint Manipulator
Posts: 184
|
Post by tauster on Sept 12, 2013 6:20:57 GMT -5
It all started out with me wanting to shot some scenic pics with the mushrooms on the magnetic bases. Then I thought 'let's add some more scenery!'And then it derailed... ...I ended up trying to stuff as much of my dungeon dressing as possible onto a 26 ' x 26 ' battlemap as I could. The big bicture: i.imgur.com/Npg6MsT.jpgMykonids among the mushrooms: i.imgur.com/Njxni2m.jpgI have no idea what these two bulbous things are made of: i.imgur.com/Ib39zJQ.jpgI got them cheap on ebay and am very happy with their unworldly look. Does someone happen to know what this is? My guess is some kind of plant... More mushrooms. I don't really like both color schemes, so I'll do some more 'shrooms. I still have a dozen of the large ones waiting to be painted, and I'm itching to do more of the smaller ones, DMG style... i.imgur.com/argTdc5.jpgi.imgur.com/o7RQlkp.jpgi.imgur.com/aas6yST.jpgAnd the screaming psychic reed: i.imgur.com/MJXjlgO.jpgThe large base in the foreground is a broken sidewalk stone, painted up and with some magnets added. i.imgur.com/wZOPKae.jpgSo far I am pretty happy with the results, only the battlemap breaks the color scheme a bit. Since I don't care for the grid, I'll probably do some generic modular cardboard cave tiles. |
|
tauster
Paint Manipulator
Posts: 184
|
Post by tauster on Sept 12, 2013 6:03:21 GMT -5
|
|
tauster
Paint Manipulator
Posts: 184
|
Post by tauster on Sept 11, 2013 13:50:50 GMT -5
Ideas are the currency of community. I'm considering to use this as my signature... |
|
tauster
Paint Manipulator
Posts: 184
|
Post by tauster on Sept 11, 2013 13:48:53 GMT -5
Picture of the large mushrooms and the medium-sized ones. I glued small neodym magnets to their stem so I can easily use them in different tiles and settings. i.imgur.com/8BIYGbK.jpgOn the right side you can see magnetic bases whose basecoat is drying. |
|
tauster
Paint Manipulator
Posts: 184
|
Post by tauster on Sept 11, 2013 13:35:15 GMT -5
Tauster, you've posted some really great ideas and places to obtain materials for crafting! Thanks! I'm doing this for two reasons: First, I have been stunned countless times, whenever I saw a new tutorial by DM Scotty, then The DMG and then when I finally joined this community, so I am happy to give something back as well. Second, you can say I'm also doing this for egoistical reasons: If I share my ideas here, there are dozens of people who can point out flaws, offer improvements and/or taking my ideas a step forward into directions I would have never thought of. This is a principle that's been at work since the industrial revolution, when people took inventions made by others, improved them and gave them back into the pool, where others improved further. Of course their motivation was profit, unlike ours... But the power of the internet multiplies and accelerates this principle: When I post something here, I don't have to wait months or years until someone else improves upon it - sometimes it takes only hours until I get something back. Third, I'm hunting for praise and adoration. Just kidding, mostly. Before this post completely derails my own thread, here's something else: Screwcaps.These things enter my household almost on a daily basis, and even before crafting I have kept some glasses with screw tops for later use (homemade chutneys, jams, pickles, etc.). But until recently, I kept only a fraction of them, the rest were thrown away. Not anymore. First, these caps are magnetic, and thus can be used as is for magnetic bases. Just paint them up, glue some basing materials on (rock chips, static grass, yaddayadda) and there you go. Here's an example with mushrooms on (unpainted) screwtops. I glued small (5x5x2 mm) neodym magnets to their stem, so I can use the shrooms on other tiles as well: i.imgur.com/8BIYGbK.jpgThe second use is also for magnetic bases, but differently. As these caps are quite high and sometimes I want very flat bases, I came up with something else: I cut them into strips of 4 - 5 mm (use only old but strong scissors!) and later into small squares, which I glue on my base: i.imgur.com/0l2vyjw.jpgWait until dry, then glue on some basing decoration. I used only rocks, because these will be used in an underdark campaign. i.imgur.com/UwQPlIo.jpgAgain, wait until dry and paint it up however you want. I'll go for a plain generic Black / grey / white drybrush color scheme, because I want to use the bases in other settings as well. Here's the black basing that is at this moment drying. You can still see where the metal squares are, but only barely. I expect them to nearly disappear once the paint job is done. i.imgur.com/o3vNgSJ.jpgI'll post pics of the finished pieces when they're done. |
|
tauster
Paint Manipulator
Posts: 184
|
Post by tauster on Sept 11, 2013 6:08:48 GMT -5
My gluegun dribbles. This annoyed me for a while, but then I realised that tese dribbles, if left drying without disturbing them, create an interesting shape: i.imgur.com/ATMlFit.jpgI didn't have an idea what to do with it (apart from eyes maybe), but from then on I peeled them off the paper and kept them in a small glass. Fast forward a few weeks of crafting and collecting dribbles... One of my campaigns will soon feature a lot of Torog-influenced Terrain, i.e. mutated flesh and bubbling cysts. Torog is, at least when it comes to the aesthetics (if you can call it that), partially parts similar to Warhammer's Nurgle. I always ...*ahem*... liked the open pustules on Nurgle's servants. See these Plagebearers for an example: www.tartanpaint.info/wp-content/uploads/2013/01/nurgle-plaguebearer-wip61.jpgfc02.deviantart.net/fs70/f/2013/145/7/a/plaguebearer_of_nurgle__painted__by_demoncloak89-d66i0eo.jpgIt hit me yesterday how to replicate these pustules: 1) Make a large squirt of hotglue 2) Wait until it has dried somewhat 3) Carefully press the dribbles in 4) Let the whole thing dry and 5) Paint it up. Should be super-easy, I thought. Turns out it is super-easy! I haven't painted it up so far, but here's how the stuff looks just before painting: i.imgur.com/AbNiPBh.jpgI also tried to do some 'crawling, sprawling flesh'-type of terrain. DM Scotty's door to the fleshy room was a good inspiration for that one. I'm not sure how exactly I'll paint that up, but here's hot it looked so far. i.imgur.com/7YkDM1x.jpgi.imgur.com/kpBehdB.jpgi.imgur.com/LXlvw9b.jpg |
|
tauster
Paint Manipulator
Posts: 184
|
Post by tauster on Sept 11, 2013 1:45:51 GMT -5
Great ideas for use of something most people just throw out without a second thought! Good inspiration, thanks for posting! This is exactly what I try to do here. Collecting ideas what to do with materials you normally would throw away. Normally, we come up with an idea for a tile first and then look which materials we need, but reversing that direction can lead to cool inspirations too. |
|
tauster
Paint Manipulator
Posts: 184
|
Post by tauster on Sept 10, 2013 15:51:17 GMT -5
Fantastic - another way for crafting slimes. My players will hate you guys! I already have an army of small slime creatures, but now I can add some giant G cubes that can actually swallow the PCs. [cue evil laughter] |
|
tauster
Paint Manipulator
Posts: 184
|
Post by tauster on Sept 10, 2013 15:32:22 GMT -5
Imperial is just bonkers... I tried expressing 6.5cm in inches and just gave up and so my videos refer to cm unless something equals 2.5cm then I say inch. How did you put a man on the moon with that system? If only imperial length units were all that's bonkers... but look at weight, temperature and dates and you see the same chaos. Oh my...  |
|
tauster
Paint Manipulator
Posts: 184
|
Post by tauster on Sept 10, 2013 12:08:00 GMT -5
We have now collected ideas for building mushroom and funghi of a lot of different sizes. I have done... - large ones (appr. 10-15 cm) loosely based on this tutorial, with magnets added so I can use the stems elsewhere and store them better) who are waiting to be painted... Once I can decide on a color-scheme that's fitting for an underdark campaign; they will be co-used as environmental hazards on the King's Highway (--> Torog, the King that crawls)- small-ish (3-4 cm) toadstools (copying DMG's tutorial #023) - tiny ones (1 - 2cm) sculpted from Green stuff I'll add to this collection... - the tackshrooms and - large fungi growing on trees (dunno if 'bracket fungi' is the correct english term; what I mean is something along these lines) This should be enough for some great fungus encounters! |
|
tauster
Paint Manipulator
Posts: 184
|
Post by tauster on Sept 10, 2013 9:33:26 GMT -5
'nother way to make small* shrooms: * "small" is relative, as they will be still waist-high compared to a standard mini...www.shabbybeachnest.com/miniature-fairy-mushrooms/Painted upholsters tacks - who would have thought of that? I LOVE the simplicity if the idea! Some pics from the tutorial:     |
|


