|
|
Post by indigo777 on Jul 1, 2013 3:18:52 GMT -5
Here's some quick oozes I made using hotglue. First I drew some circles the size I wanted the oozes to be. Then I filled the circles with various globs of hotglue and experimented with layers of glue to make several oozes. 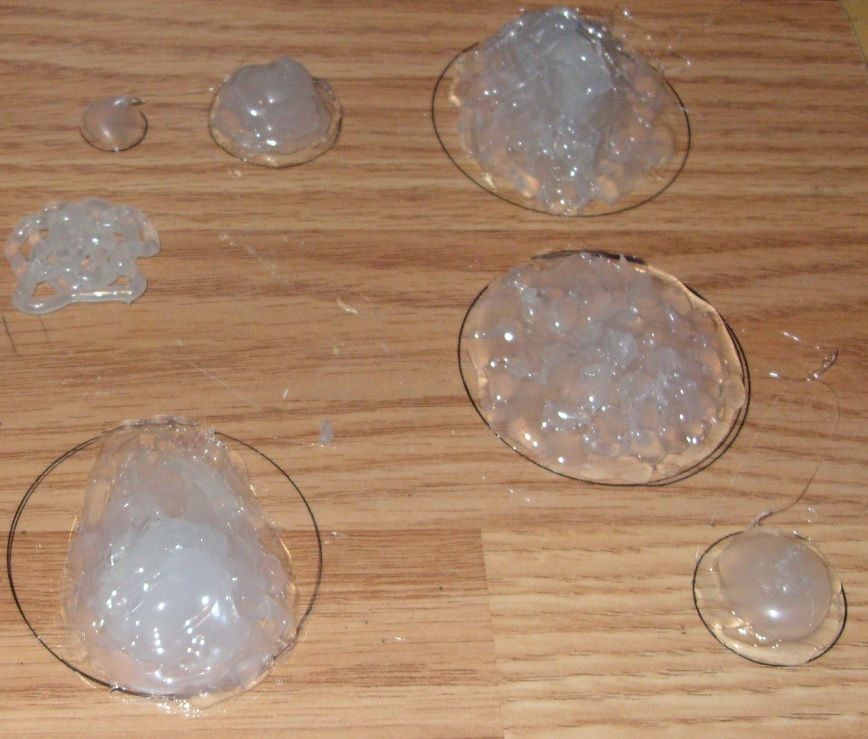 This is one of the first oozes I made. 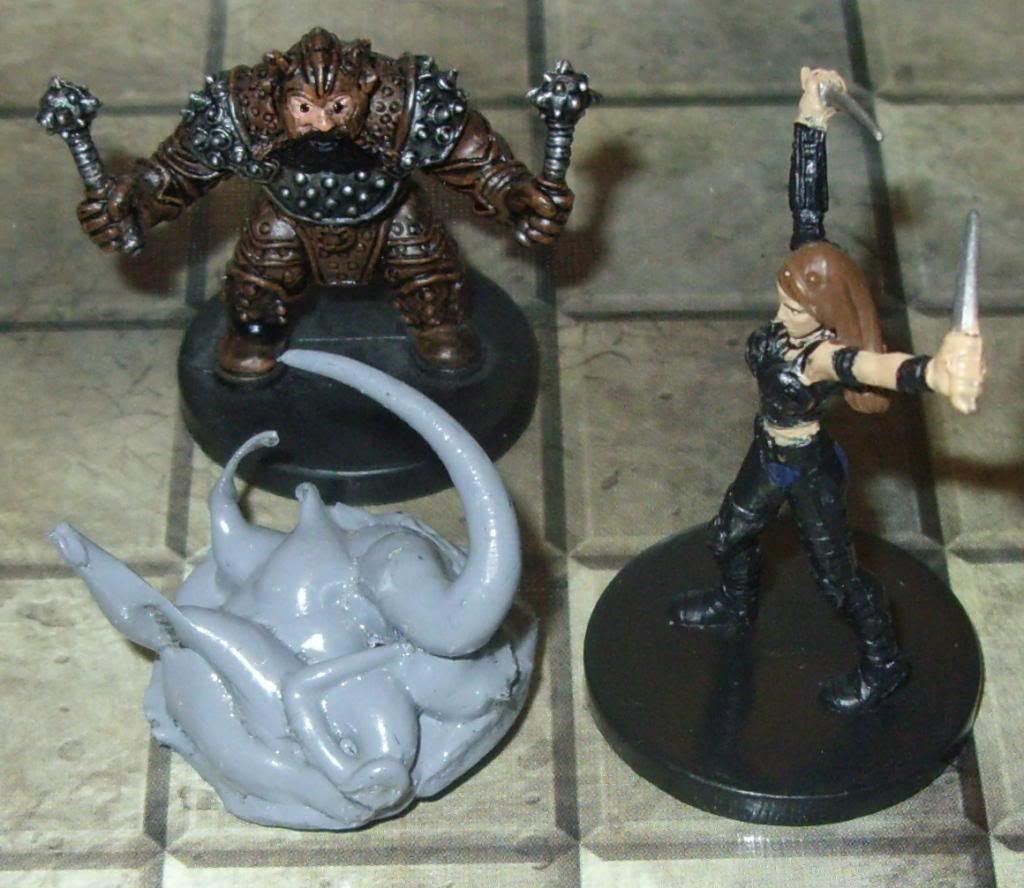 To make the tendrils I put a large glop of glue on a base of cooled hot glue and pulled the glue gun away slowly as I blew air on the glue that came out of the nozzle. This cooled the glue further away from the nozzle into a solid structure to support the new glue coming out. As the glue guns trigger goes as far as it can the amount of glue coming out lessens and you get a natural taper off until you get a fine spiderweb like line of glue coming off the end of the tendril. Clip off the line at the length and thickness you want the tendril to be. I learned a lot from it especially how not to paint them. On this one I painted it solid gray. Big mistake. Now I paint the oozes with paint washes rather than solid paint in order to keep the clearness of the hotglue so light would go through the ooze. I coated the wash with a thick glossy clear coat of paint to keep them looking slimy. Here's some newer ones. Large Gray Ooze. 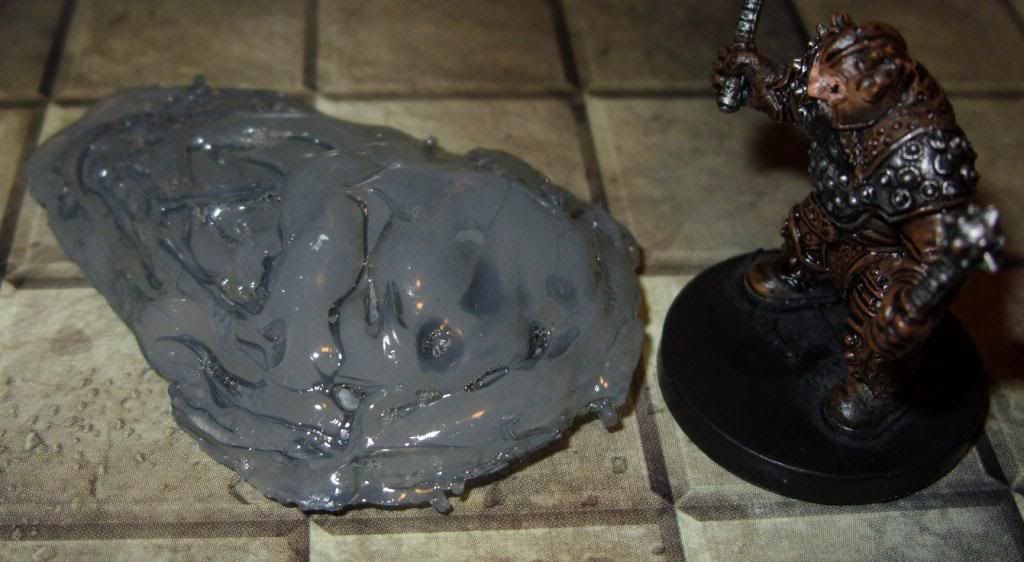 Green Slime 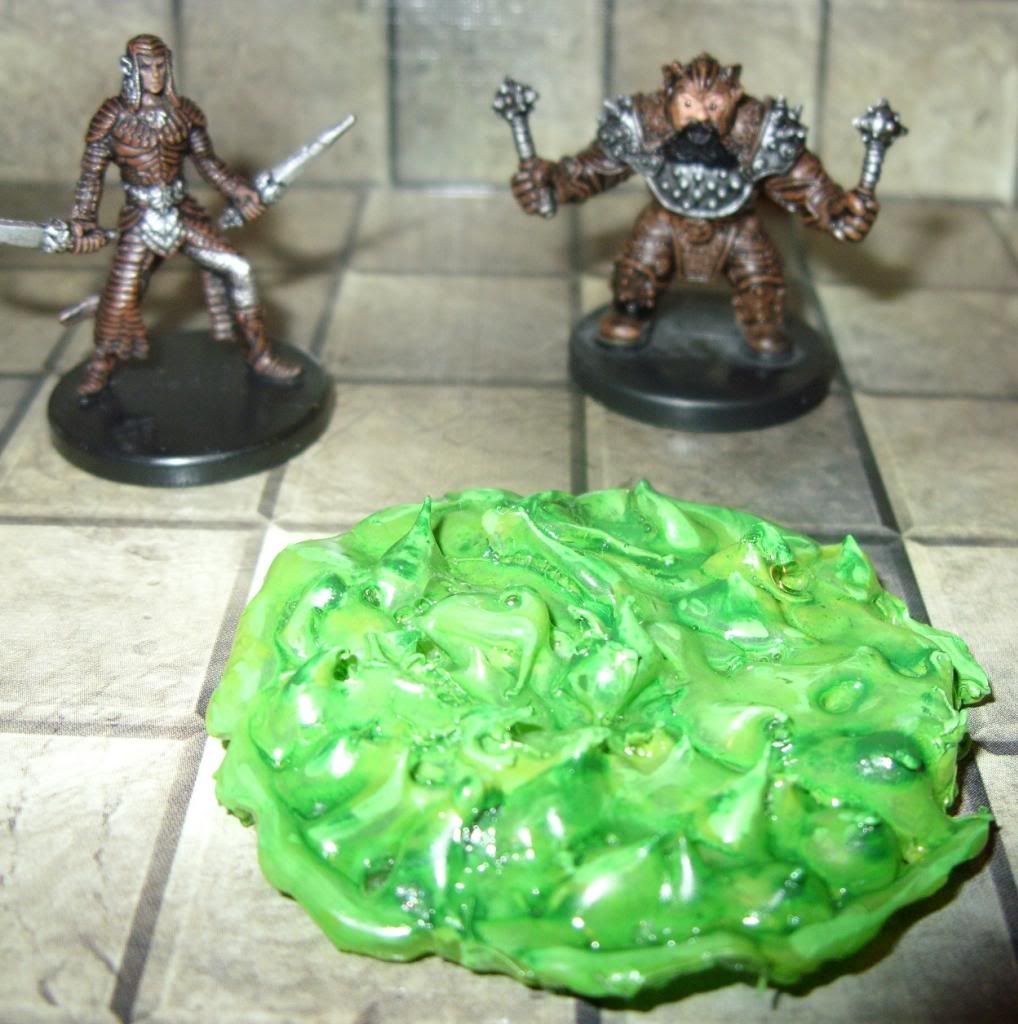 I tried a little experiment as well. I wanted to make an Angler Ooze. An Angler Ooze is an ooze that lures in bugs and players by mimicking candle light/campfire light. It has a central rise of bio-luminescence and two tendrils on either side of the light to snatch bugs with. In order to make it I used a cheap LED Tealight that flickers like a candle. The tealights separate very easily from the top piece with the fake plastic flame. This leaves you a nice open LED to coat in hotglue while the battery and switch are encased safely in the bottom piece and will stay easily accessible. I used the same method as before to make the ooze except I placed the tealight in the middle of the circle before glueing. I tested the leds reaction to the glue as well. After 10 minutes of it being on covered in glue I can safely say the flickering LED does not get hot at all so the glue doesn't melt lol. 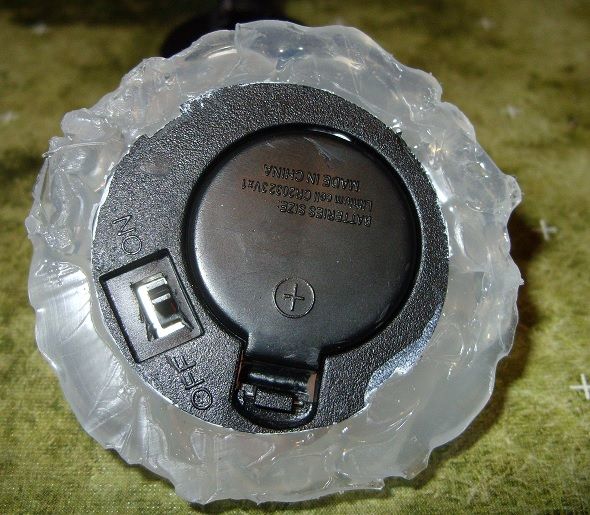 My players are constantly wary of strange lights in the distance expecting the classic Will-Of-the-Whisps, I hope this strange light throws them off a bit. Finished Angler Ooze 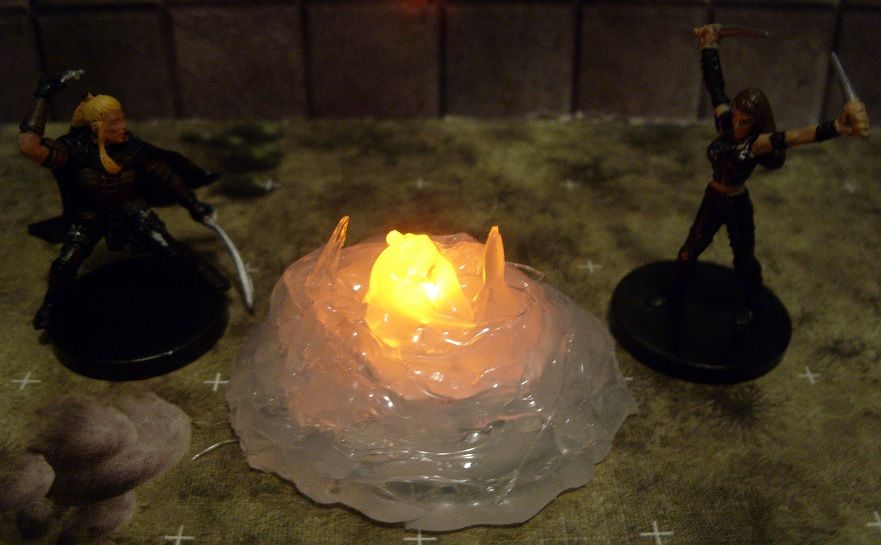 Edit: Added the pics of the black pudding from further down thread into this post. 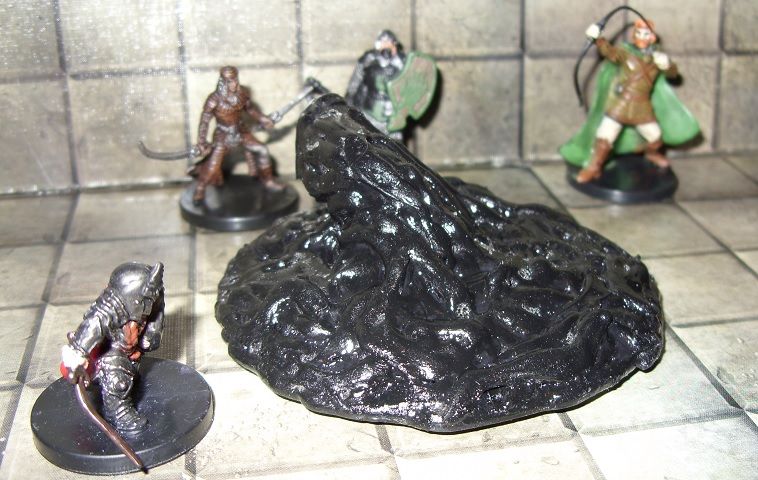 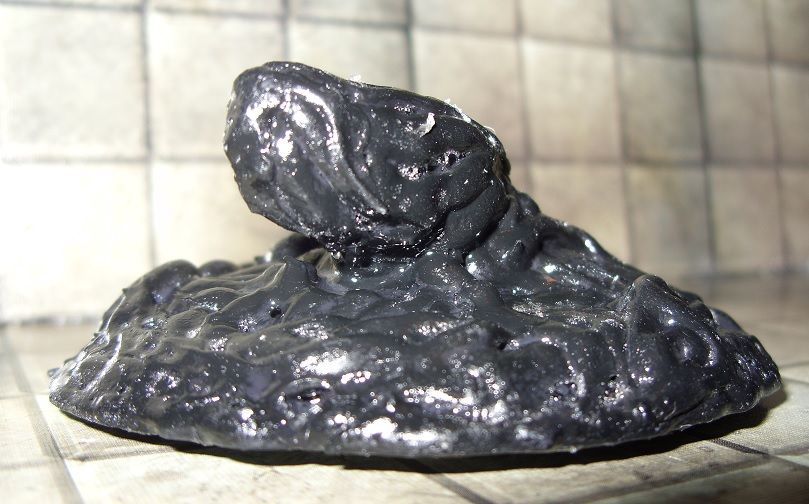 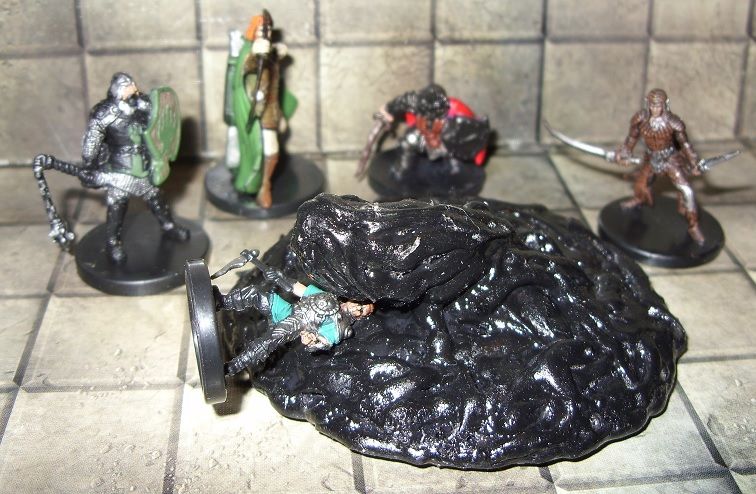 |
|
|
|
Post by Efilion on Jul 1, 2013 3:37:14 GMT -5
Wow those look amazing, great job!!!
|
|
kyral
Paint Manipulator
 
Posts: 121
|
Post by kyral on Jul 1, 2013 5:24:10 GMT -5
Wow, these are awesome.. What colors did you use for that green ooze? I really like that one a lot..
I have been thinking of trying these out myself, now that you have done it, I can use your method instead of wasting paint and glue... Hazaa...
|
|
|
|
Post by juvenihilist on Jul 1, 2013 6:05:29 GMT -5
|
|
|
|
Post by unclebilly on Jul 1, 2013 6:42:32 GMT -5
Good looking
|
|
|
|
Post by nubaumpalemoon on Jul 1, 2013 11:11:52 GMT -5
The oozes look great. I remember seeing a video a while back on Youtube where the LED lights were also used in the middle of cotton balls that we painted red/orange/yellow/black to make it look like fire and have wanted to try that myself for a while.
Keep up the good work!
|
|
|
|
Post by skunkape on Jul 1, 2013 11:39:47 GMT -5
Interesting experiment! I like the one made with the tea light!
|
|
|
|
Post by dm1scotty on Jul 1, 2013 12:43:27 GMT -5
Awesome tips and experimentation.
|
|
|
|
Post by indigo777 on Jul 1, 2013 13:12:54 GMT -5
Wow, these are awesome.. What colors did you use for that green ooze? Used 3 different shades. Apple Barrel Kelly Green, Apple Barrel Spring Green, and Delta creamcoat Leaf Green. I started with leaf green, dipped the brush in paint and water and ran it over the ooze as a thin paint wash. When it was dry I did the same with kelly green to add darker green highlights to the low spots of the ooze. When those were dry I highlighted the raised parts with spring green. For the clear gloss I used an old bottle of Folk Art Crackle Medium. Its a thick clear glossy paint that kind of looks like clear corn syrup. Its meant to be painted on an object thinly as a base coat that makes paints painted over it have an antique peeling paint texture. I used it because you can take a large brush of it and glop it onto the slime. By putting it on thick it captures a lot of bubbles of air and gives a nice effect.It dries into a glossy clear coat that adds an extra layer for light to travel through adding more depth to the ooze and making it look like its covered in a clear layer of slime. |
|
justsix
Cardboard Collector
 I will not be pushed, filed, stamped, indexed, briefed, de-briefed or numbered! My life is my own!
Posts: 41
|
Post by justsix on Jul 1, 2013 15:47:51 GMT -5
Looking good! I'm planning on doing the same thing for an upcoming game. The players are facing a black pudding, and this seems like the perfect technique...
|
|
kyral
Paint Manipulator
 
Posts: 121
|
Post by kyral on Jul 1, 2013 18:27:50 GMT -5
Thank you man, I think I have 2 of those colors in my arsenal of paints.... Craft store here I come... Muahahahahahaha (I never thought I would be excited to go to a craft store...)
|
|
gallant
Cardboard Collector

Posts: 49
|
Post by gallant on Jul 2, 2013 8:17:19 GMT -5
Thanks for sharing, I'm gonna make some myself. Nice painting on the green slime and cool idea with the Angler Ooze!
|
|
|
|
Post by blooddiamond on Jul 5, 2013 12:48:23 GMT -5
These are real good. Imma big fan of the green on and the one with the light.
|
|
caveman
Paint Manipulator
 
Posts: 107
|
Post by caveman on Jul 10, 2013 10:11:31 GMT -5
Those look just about perfect, which is to say: like globs of acidic snot. Nice job! Loved the tea light idea.
|
|
|
|
Post by indigo777 on Jul 10, 2013 13:44:18 GMT -5
|
|
|
|
Post by clanoneillguy on Jul 12, 2013 10:08:09 GMT -5
Fantastic job. I'm going to try your technique myself.
|
|
|
|
Post by indigo777 on Jul 15, 2013 9:03:41 GMT -5
I spent some time testing out some different techniques for quickly releasing the oozes from whatever material you make them on. The best method I found was to apply a really thin layer of petroleum jelly to the material you are making the oozes on. Just smear the jelly as thin as you can over the circles and then apply the hotglue over it. The ooze will peel right off the surface when done and maintains its shape even better. Works great and you can easily clean off any petrol jelly left on the bottom of the ooze with a paper towel.
|
|
luciano
Paint Manipulator
 
Posts: 202 
|
Post by luciano on Jul 15, 2013 10:43:51 GMT -5
Dude! Very good!
The Shining is fantastic! Really easy and cheap, and look great!
|
|
|
|
Post by nubaumpalemoon on Jul 15, 2013 11:29:15 GMT -5
Added a Huge Black Pudding to my collection.  The dwarf in this picture has an excellent sword for slashing creatures that are around a dungeon corner.  |
|
Malachi
Cardboard Collector
 Make it fun! Make it memorable!!
Posts: 7 
|
Post by Malachi on Aug 5, 2013 14:16:09 GMT -5
Those are some really awesome oozes! Thanks for the heads up about using washes instead of straight color. Your sacrifice has saved us all!
|
|
|
|
Post by m3talslime on Aug 6, 2013 19:37:09 GMT -5
I really want to use the tendril technique. Did you use canned air to cool it, or was a fan sufficient?
|
|
|
|
Post by indigo777 on Aug 6, 2013 23:20:11 GMT -5
I really want to use the tendril technique. Did you use canned air to cool it, or was a fan sufficient? Just use your breathe. I tried the fan and it doesn't work as well as the human body, since we can control the air flow, speed, pressure and stop the airflow instantly. The fan tends to cool the gun too much or blow the glue to the side too much so it tips over on itself. Its best to just mess around a bit with a low temp and high temps glue gun blowing air across the glue to figure out the best method. High temp is good for clearer puddle type oozes and low temp is better for tendrel or bubbly type oozes. |
|
|
|
Post by m3talslime on Aug 7, 2013 7:17:22 GMT -5
Ah, thanks! I hadn't even considered the low-temp setting.
|
|
|
|
Post by nctheory on Aug 7, 2013 19:21:06 GMT -5
Simple, yet amazing. Definitely trying this.
|
|
tauster
Paint Manipulator
 
Posts: 184 
|
Post by tauster on Aug 24, 2013 6:49:47 GMT -5
|
|
|
|
Post by markd1733 on Aug 24, 2013 8:07:17 GMT -5
What about using Teflon pan to put the hot glue smear? That will release. I am sure you can get a "disposable" Teflon pan at the dollar store for cheap.
|
|
sgtslag
Paint Manipulator
 
Posts: 102 
|
Post by sgtslag on Aug 24, 2013 18:41:21 GMT -5
Use Parchment Paper, from the grocery store, next to Wax Paper, and Aluminum Foil (Hot Glue will stick to both of these materials...): Hot Glue will NOT stick to it, period. The same piece of Parchment Paper can be used many times before it wears out. Cheers!
|
|
|
|
Post by indigo777 on Aug 24, 2013 19:45:50 GMT -5
You can also take and smear a really thin layer of petroleum jelly on the surface of the object you will be hot glueing on. I use a scrap piece of wood for mine. I Draw a circle the size I want the ooze to occupy on the wood scrap, smear jelly in the circle and then hot glue the area. When the glue dries the ooze slides right off.
|
|
tauster
Paint Manipulator
 
Posts: 184 
|
Post by tauster on Aug 25, 2013 4:49:50 GMT -5
You can also take and smear a really thin layer of petroleum jelly on the surface of the object you will be hot glueing on. I use a scrap piece of wood for mine. I Draw a circle the size I want the ooze to occupy on the wood scrap, smear jelly in the circle and then hot glue the area. When the glue dries the ooze slides right off. Since I don't have parchment paper at hand, I tried the petroleum jelly variant. ...or at least something similar: As I couldn't find petroleum jelly, I used some old hand creme that has been sitting in the bathroom cabinet for years, unused. I applied it to a sheet of paper and an old cheese box and 'webbed it' with strands of hot glue. result: First, it is damn hard to get the hot hotglue into small strands because it continues to run, eventually forming into something like a broar river instead of a slim line . I think I just need more practice and experimentation. Second, the creme I used it totally useless for preventing the hotglue to bond with whatever it is glued on - the stuff sticks with both paper and box. Experiment failed.  I gave it a second shot, this time using rapeseed oil generously smeared on paper. Results: First, I still don't get the glue to form thin strands.  Second, it worked - *huzza!* After waiting for the glue to try, I was able to carefully pry it off the oil-smeared paper. If you pull too fast, some of the paper will be ripped off and stay on the glue. If this happens, immediately stop and pull from the opposite side, this time slower and more carefully. You should be able to get the strand off without the paper bonded to it. If you hae it completely off the paper, put it in water and add some dish washing fluid to get the oil off the web.   Next time I'll use a plastic sheet instead of paper, this should work a lot easier. @indigo77: Your tip was worth it's weight in gold - thanks!  Even it the initial attempt failed, I found a way in the end that works. @all: I'm still quite new to this forum, but I absolutely love how we make progress together by sharing ideas. Hats off to all of you!  |
|
|
|
Post by indigo777 on Aug 25, 2013 6:57:52 GMT -5
Judging by the way the hot glues spreading out it looks like you are using a high temp glue gun. For thin strands you don't want to spread out try a low temp mini glue gun, these can be gotten at most craft stores for around $5-7 dollars and will most likely use the same hot glue sticks as the high temp ones (look for multitemp on the packages of hot glue, most hot glue sold today is multitemp). The glue will dry really fast and maintain its thin strand like look. High temp glue tends to run and spread, low temp glue tends to maintain its shape until interacted with. You can also dip the hot tip of the glue gun in the lines of glue to make some nice effects that the high temp glue guns just won't work for. For example you make spider web thin lines of glue by making a small glob of low temp glue dipping the tip of the glue gun in it and then moving upwards with the gun. This pulls the glue into strands of spider like webbing. Here's an example of web tokens I made with a low temp gun based on DM Scotty's video, but adding web strands for additional effect. 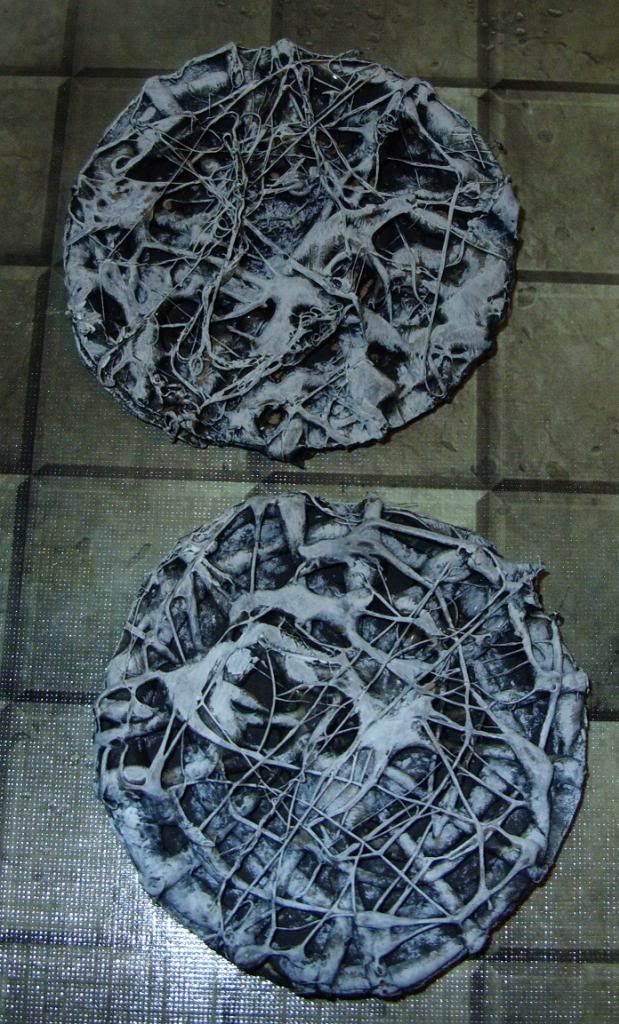 |
|


 I started wondering how it would work to put some glue on, paint it, then another cover of glue, etc.
 :
: 


