Post by indigo777 on Dec 30, 2012 0:44:43 GMT -5
I've been needing a Beholder Mini for a while and the official DnD ones are either too expensive or aren't appealing to me. I really like the classic floating ball over the floating skull and brain they've become so I went about crafting my own.
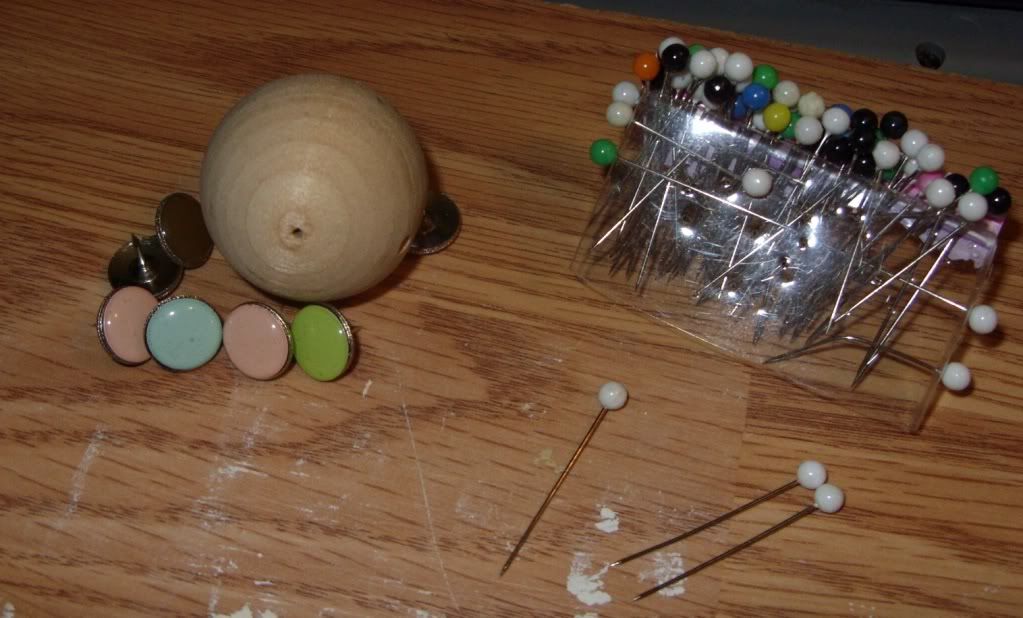
Ingredients:
-1 inch Wooden Ball (comes in a pack of a few at Hobby stores)
-Decorative Thumb Tacks ( you want the ones with a clear lens over colored paper, I found mine at Target. )
-Straight Pins ( you want the ones with the plastic ball on the end )
-Milliput or Greenstuff
-Super Glue
-Sandpaper or a file
-Good pocket knife or hobby knife
- toothbrush, or any stiff bristle brush you can use for sculpting.
Step One
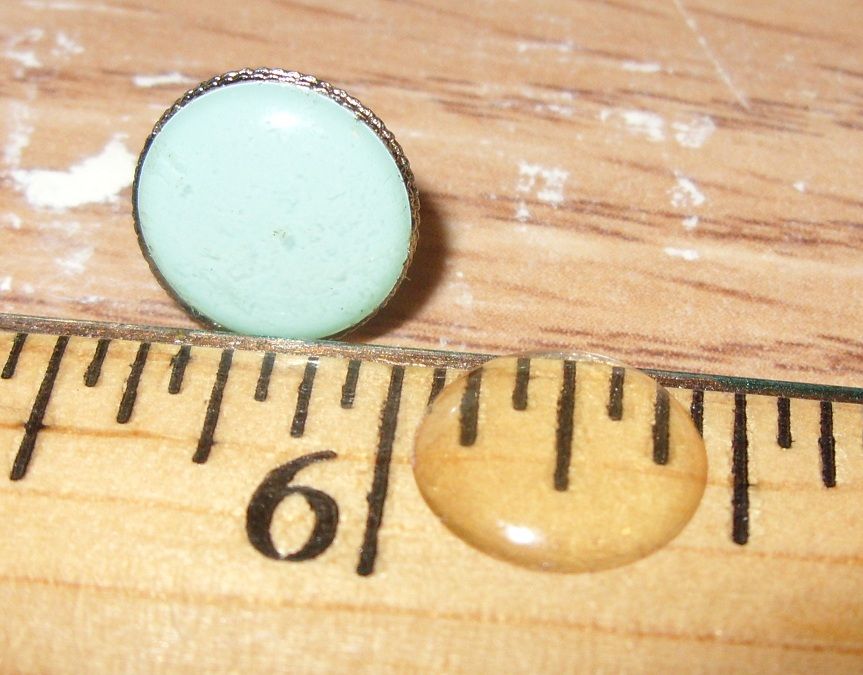
Use a knife to slide the lens off the decorative thumbtack. This will become the main beholder eye. You may need to remove the decorative paper from the back of the lens sometimes it pulls off with the lens. A knife will slide right under the paper and remove it cleanly.
Step 2
There should be a small flat spot on one side of the ball, use a file or sandpaper to flatten this spot till the lens fits on it flat.
Step 3
Outline the lens with a pen or pencil. Remove the lens and paint a nice eye there. When the eye is dry, glue the lens over the painted eye. This makes it look like an actual eye.
Step 4
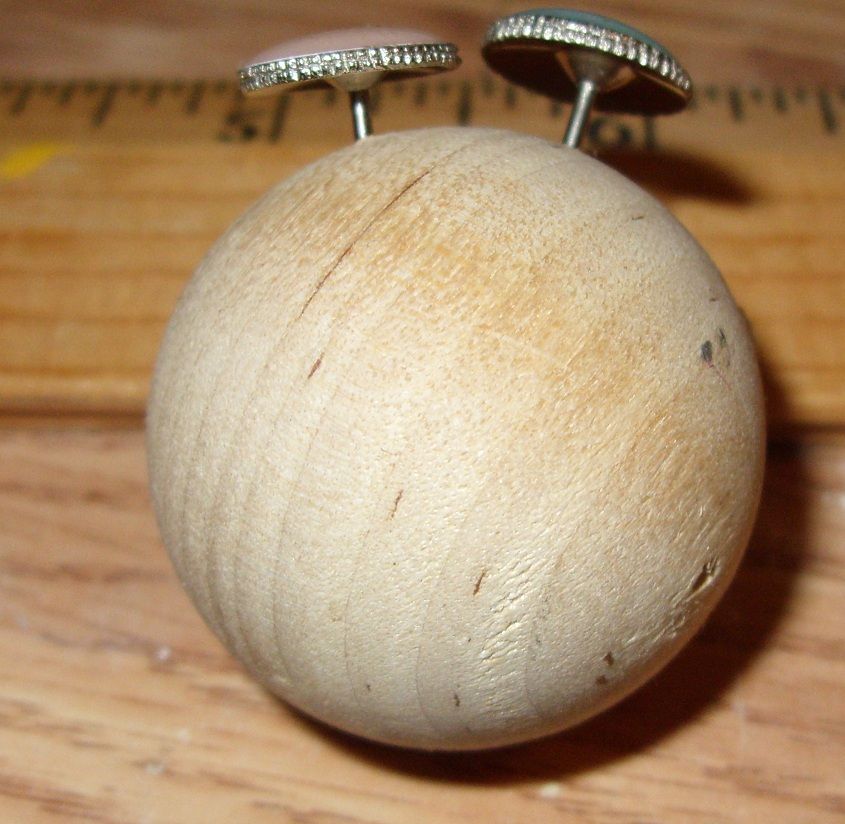
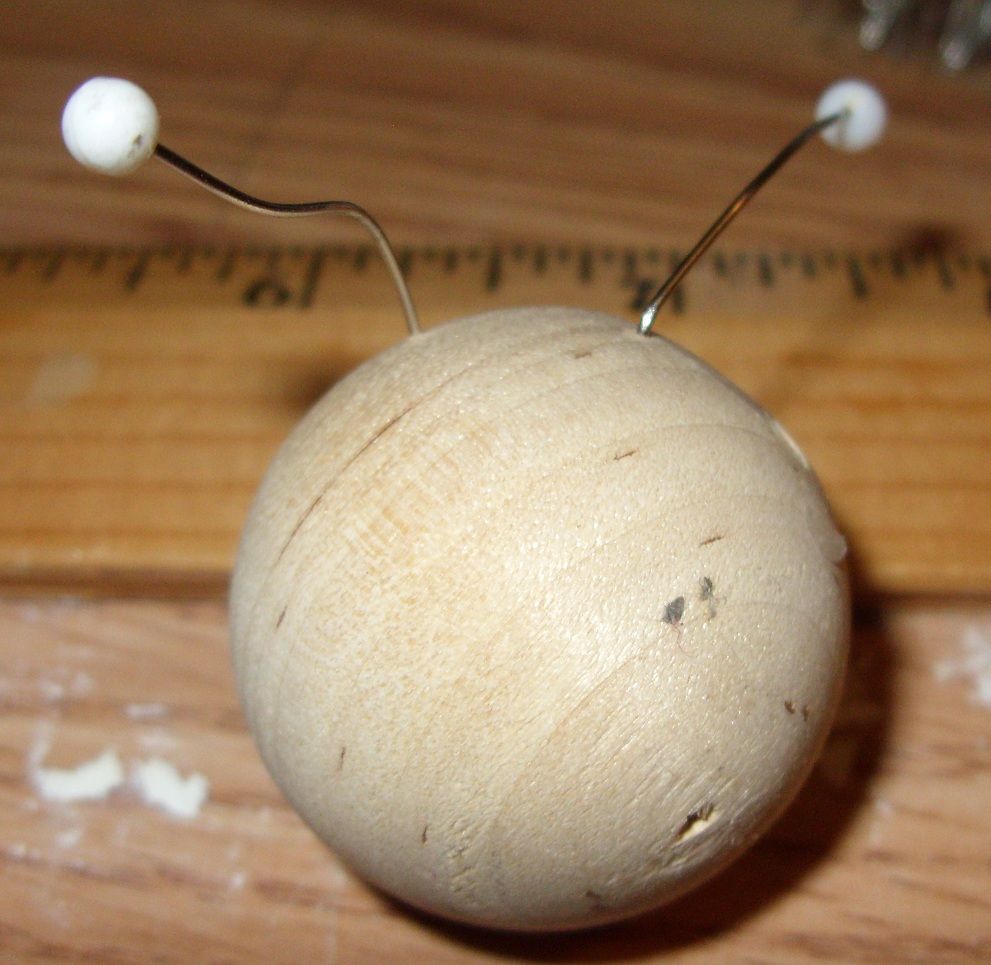
Take a thumbtack and make 10 holes around the top of the head where you want your Beholder's eye-stalks to set. Place another thumbtack through the bottom of the ball, so you have a place to hold it by while you work and a hole to mount it to a stand with. You may want to drill out the hole bigger depending on what you will use to mount it to a base with.
Step 5.
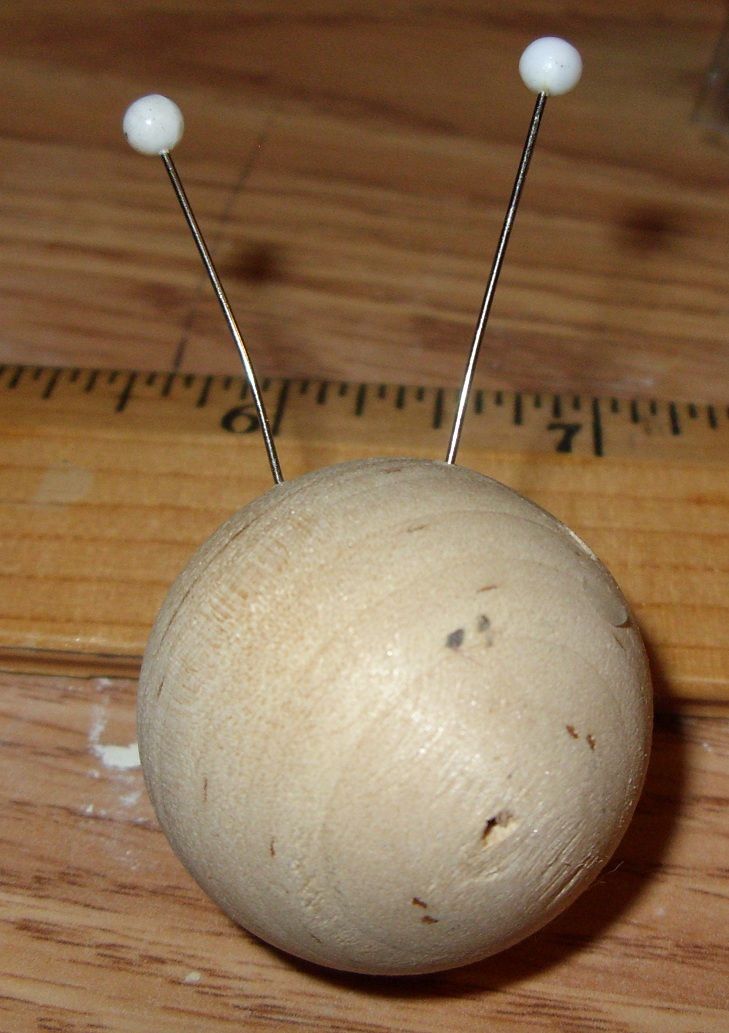
Insert the straight pins into the thumbtack holes. You may need to super glue them in place if they don't fit tightly.
Step 6
Bend the pins in the directions you'd like the Beholder eye-stalks to sit.
Step 7
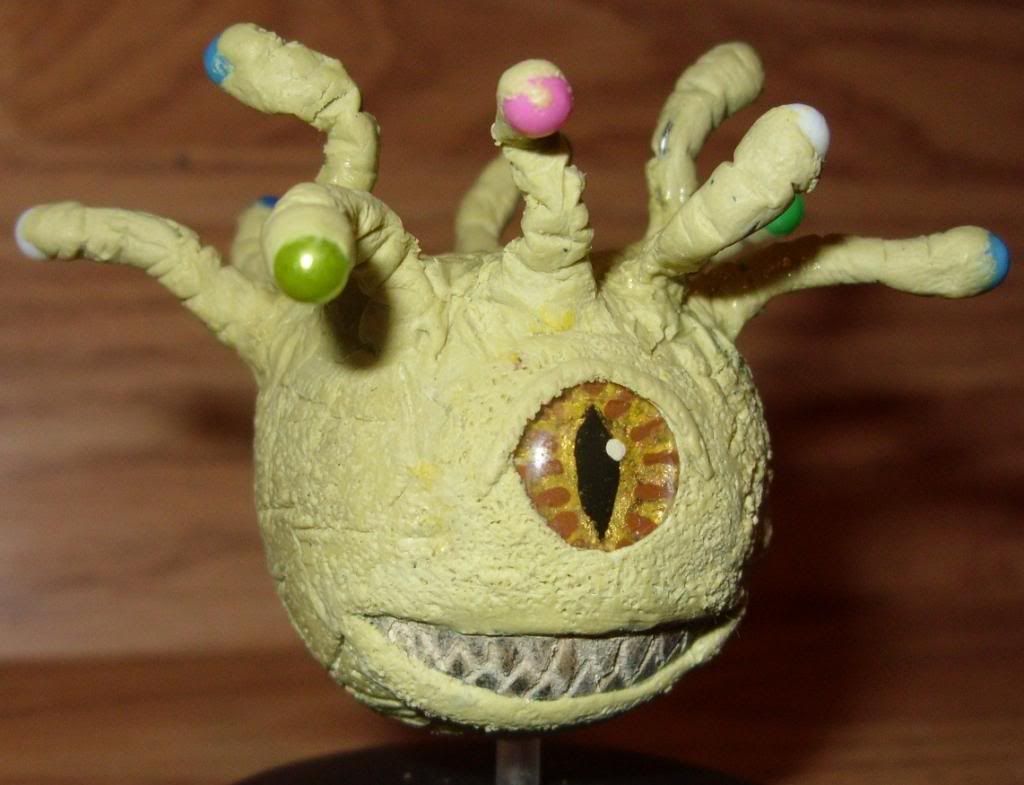
Sculpt with milliput or greenstuff. Don't worry about getting it even just smear a thin coat on the ball and pins. Don't worry about accuracy or messing up too bad its an aberration its supposed to look uneven and deformed.
For a really cheap solution Hot glue should work but you will lose detail.
Step 8
Sculpt a little bit of overlap on the main eye lens to make an eyelid with. This will lock the super-glued lens in place and hide the edges of the lens.
Step 9
Scrape away a mouth shape from the sculpted on material. Make sure you scrape it all the way down to the wood.
Step 10
Tap a brush over the sculpted material to add texture to the mini. Use a knife to press cracks and lines all over the beholder to make its armor.
Step 11
When the sculpt has dried. Use a knife or small file to cut teeth into the wood in the mouth you made.
Hopefully you will end up with something like this.
Step 12
After it dries. Paint it. I used a couple shades of brown acrylic paint and applied a thin black wash to it. Painted the eye-stalks gold to match the main eye and dry-brushed white onto its teeth. When the paint was dry I applied a clear Pearlescent paint to the teeth and edges of the mouth and the eye-stalk eyes to make the mouth look wet and the eye-stalk eyes look shiny.
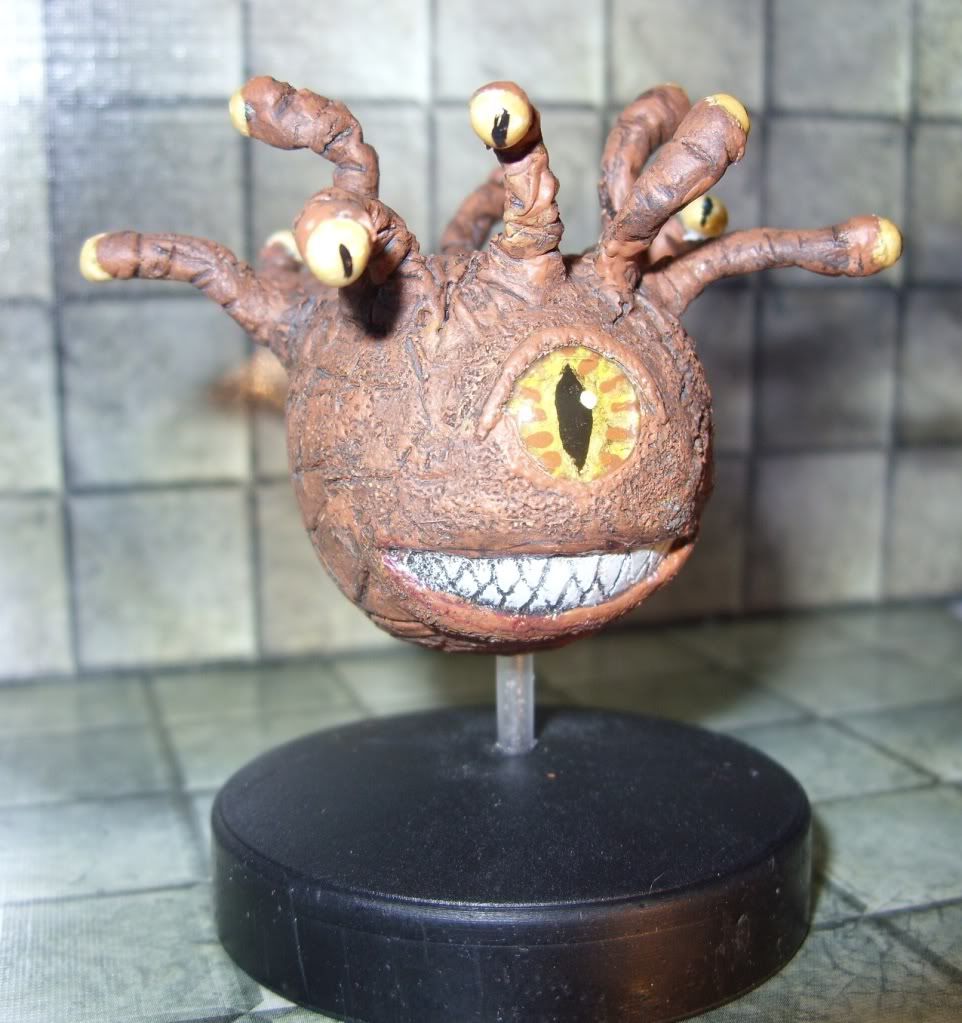
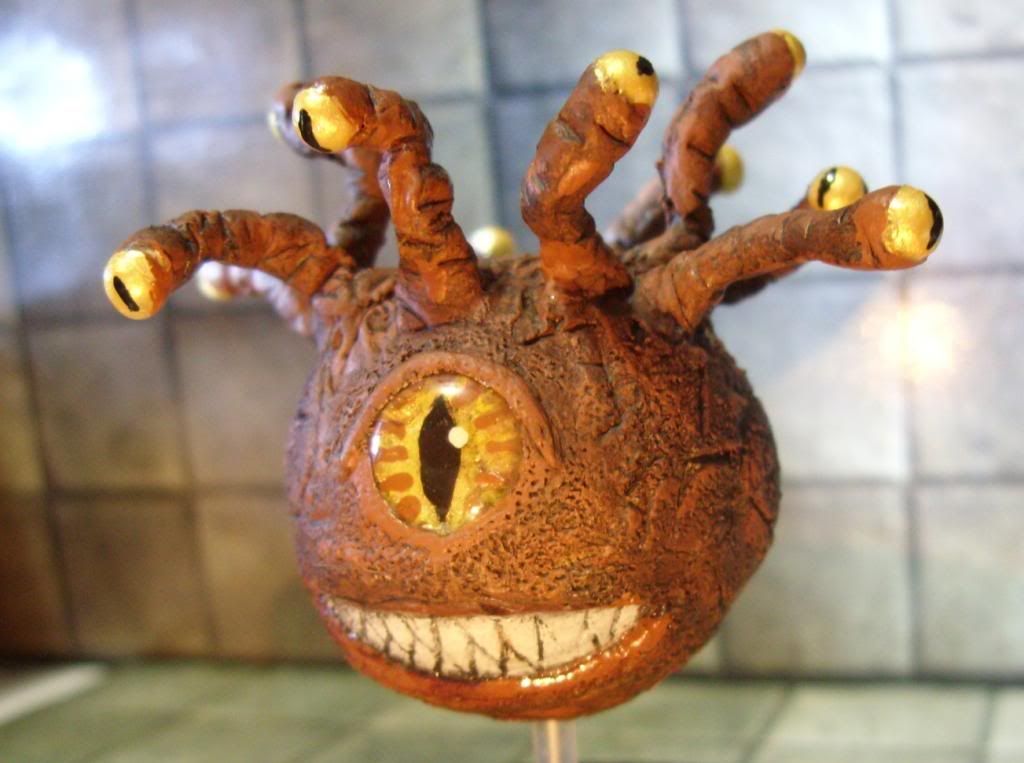
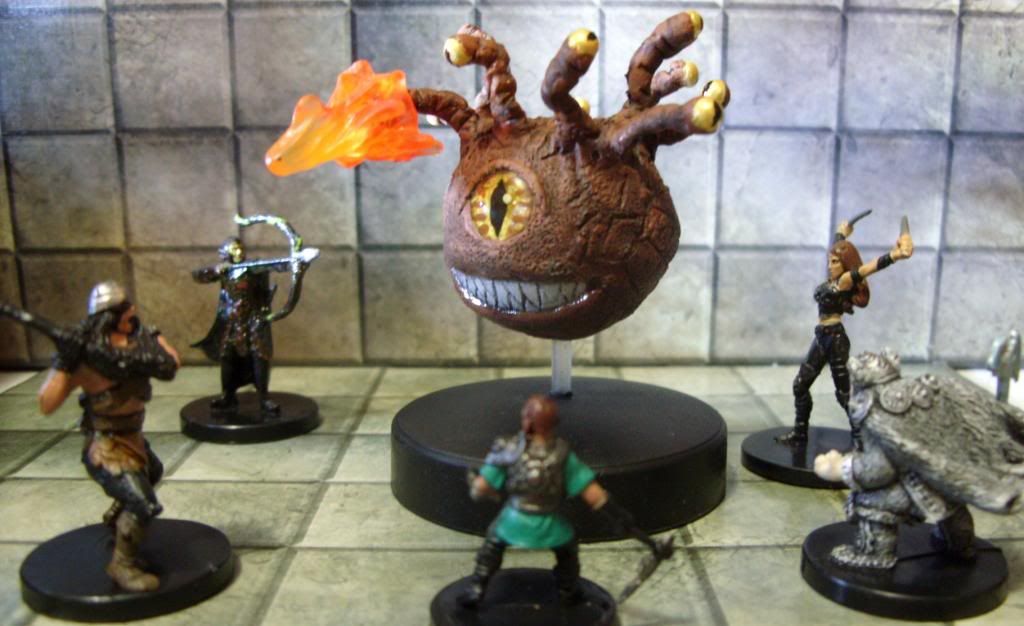
The total cost for me in new materials for this was less than 5 bucks. Actual mini cost a little over a dollar as I have enough parts to make 4 more.
Ingredients:
-1 inch Wooden Ball (comes in a pack of a few at Hobby stores)
-Decorative Thumb Tacks ( you want the ones with a clear lens over colored paper, I found mine at Target. )
-Straight Pins ( you want the ones with the plastic ball on the end )
-Milliput or Greenstuff
-Super Glue
-Sandpaper or a file
-Good pocket knife or hobby knife
- toothbrush, or any stiff bristle brush you can use for sculpting.
Step One
Use a knife to slide the lens off the decorative thumbtack. This will become the main beholder eye. You may need to remove the decorative paper from the back of the lens sometimes it pulls off with the lens. A knife will slide right under the paper and remove it cleanly.
Step 2
There should be a small flat spot on one side of the ball, use a file or sandpaper to flatten this spot till the lens fits on it flat.
Step 3
Outline the lens with a pen or pencil. Remove the lens and paint a nice eye there. When the eye is dry, glue the lens over the painted eye. This makes it look like an actual eye.
Step 4
Take a thumbtack and make 10 holes around the top of the head where you want your Beholder's eye-stalks to set. Place another thumbtack through the bottom of the ball, so you have a place to hold it by while you work and a hole to mount it to a stand with. You may want to drill out the hole bigger depending on what you will use to mount it to a base with.
Step 5.
Insert the straight pins into the thumbtack holes. You may need to super glue them in place if they don't fit tightly.
Step 6
Bend the pins in the directions you'd like the Beholder eye-stalks to sit.
Step 7
Sculpt with milliput or greenstuff. Don't worry about getting it even just smear a thin coat on the ball and pins. Don't worry about accuracy or messing up too bad its an aberration its supposed to look uneven and deformed.
For a really cheap solution Hot glue should work but you will lose detail.
Step 8
Sculpt a little bit of overlap on the main eye lens to make an eyelid with. This will lock the super-glued lens in place and hide the edges of the lens.
Step 9
Scrape away a mouth shape from the sculpted on material. Make sure you scrape it all the way down to the wood.
Step 10
Tap a brush over the sculpted material to add texture to the mini. Use a knife to press cracks and lines all over the beholder to make its armor.
Step 11
When the sculpt has dried. Use a knife or small file to cut teeth into the wood in the mouth you made.
Hopefully you will end up with something like this.
Step 12
After it dries. Paint it. I used a couple shades of brown acrylic paint and applied a thin black wash to it. Painted the eye-stalks gold to match the main eye and dry-brushed white onto its teeth. When the paint was dry I applied a clear Pearlescent paint to the teeth and edges of the mouth and the eye-stalk eyes to make the mouth look wet and the eye-stalk eyes look shiny.
The total cost for me in new materials for this was less than 5 bucks. Actual mini cost a little over a dollar as I have enough parts to make 4 more.